I have only fairly recently started using simulators, although I have always wanted to own and use one, the costs were prohibitive and were always way above my budget.
Although I still can not afford to venture into flight simulation, the prices of driving simulation software has now lowered considerably and become much more affordable.
Of course, a steering wheel can always be secured to a desk or tabletop, but this does little for realism or for comfort, and does not give the mounting security needed for simulation games that tend to require hard and aggressive turning of a steering wheel or rapid gear changes. So I decided that I would go the whole way and build myself a full 'Sim-Rig'
Although there are many choices on the market when it comes to simulator rigs, many, even the basic ones were still far beyond my personal budget and were not really suitable for what I needed, so after watching many hours of home-build videos on YouTube, I designed my own variant, one which more met my individual needs, and for the minimal in cost.
THE CRITERIA FOR MY OWN HOME-BUILD SIM-RIG
My requirements differed from those I had seen used by existing Streamers or 'Rig-builds' that were displayed on the internet, I live in a flat so free space was very restrictive, I also write books and create web pages, now my desk had gone to make way for the simulator, being able to also use it as a normal desk was also very important. I needed to be able to sit comfortably for hours and easily access my keyboard and my mouse. At first I had tried using my original desk, but having the steering wheel and gear stick mounted on the desk proved very difficult to use as the keyboard was now offset from the main screen.
I experimented by building a small sliding shelf to which I attached the wheel and gear stick, enabling it to be slid to the side out of the way, but I found this then allowed too much movement when using the wheel, and the gear stick was almost impossible to use. So I then decided to design something that would better suit both needs, keeping it as cheap as possible while remaining fully adaptable in case I needed to make later changes.
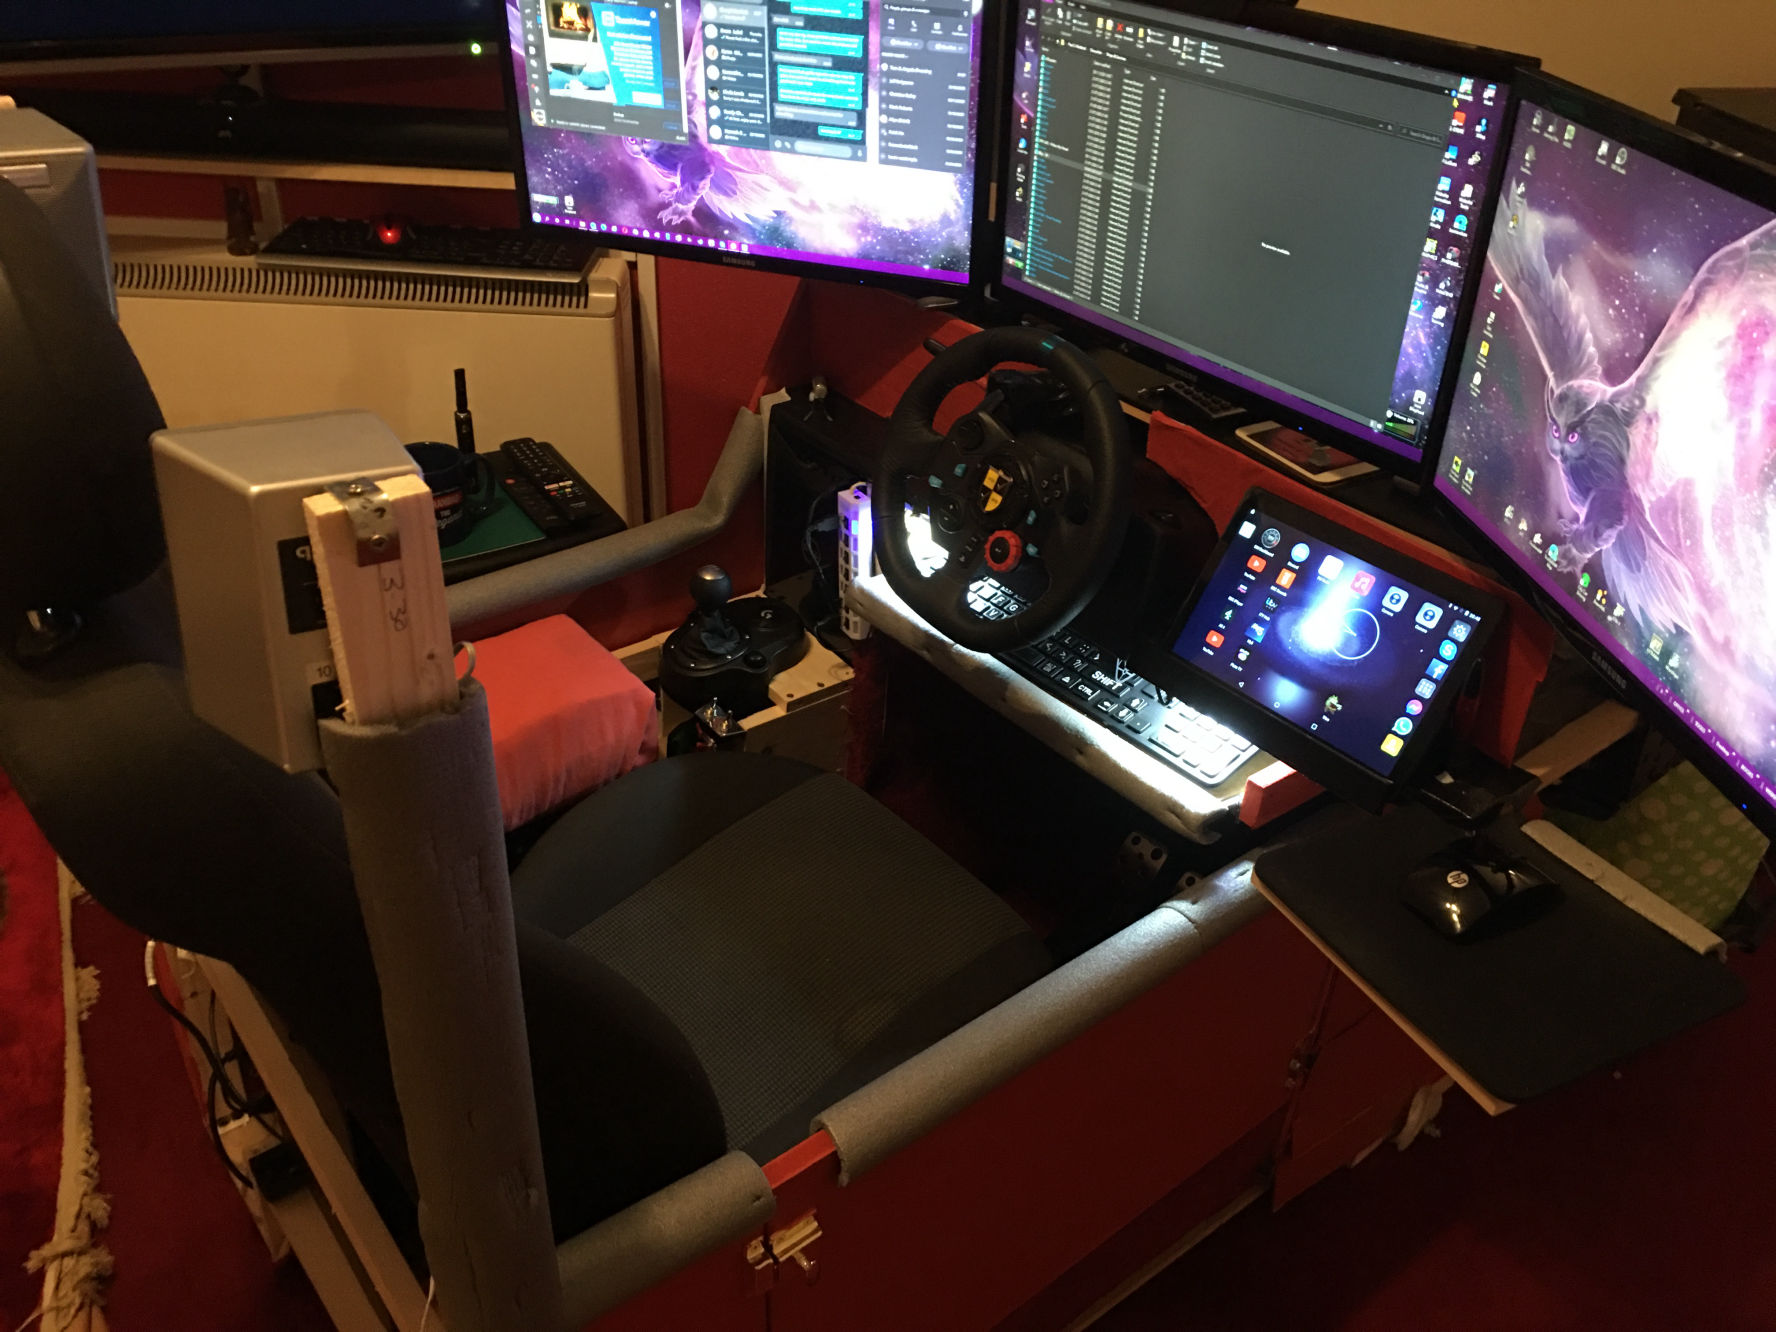
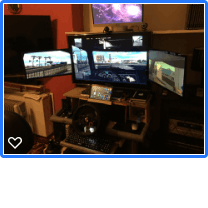
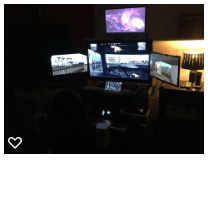
At the start I used an old 40" flat screen television as my main computer monitor, and had used smaller 22" monitors as 2nd and 3rd screens when writing or performing web design. I also had a few spare monitors from old computers that were no longer being used.
I already had the computers and the multiple screens, and I had recently purchased the wheel, pedals, and gear stick. The rest I needed to acquire at minimal cost, and whatever I built could not really take up any more room than my original desk. My old desk housed three computers, only two of these would be used now, so I needed to incorporate storage for these in the design.
Room to actually build the rig was also very limited, and most of the initial work had to be done in my narrow hallway.
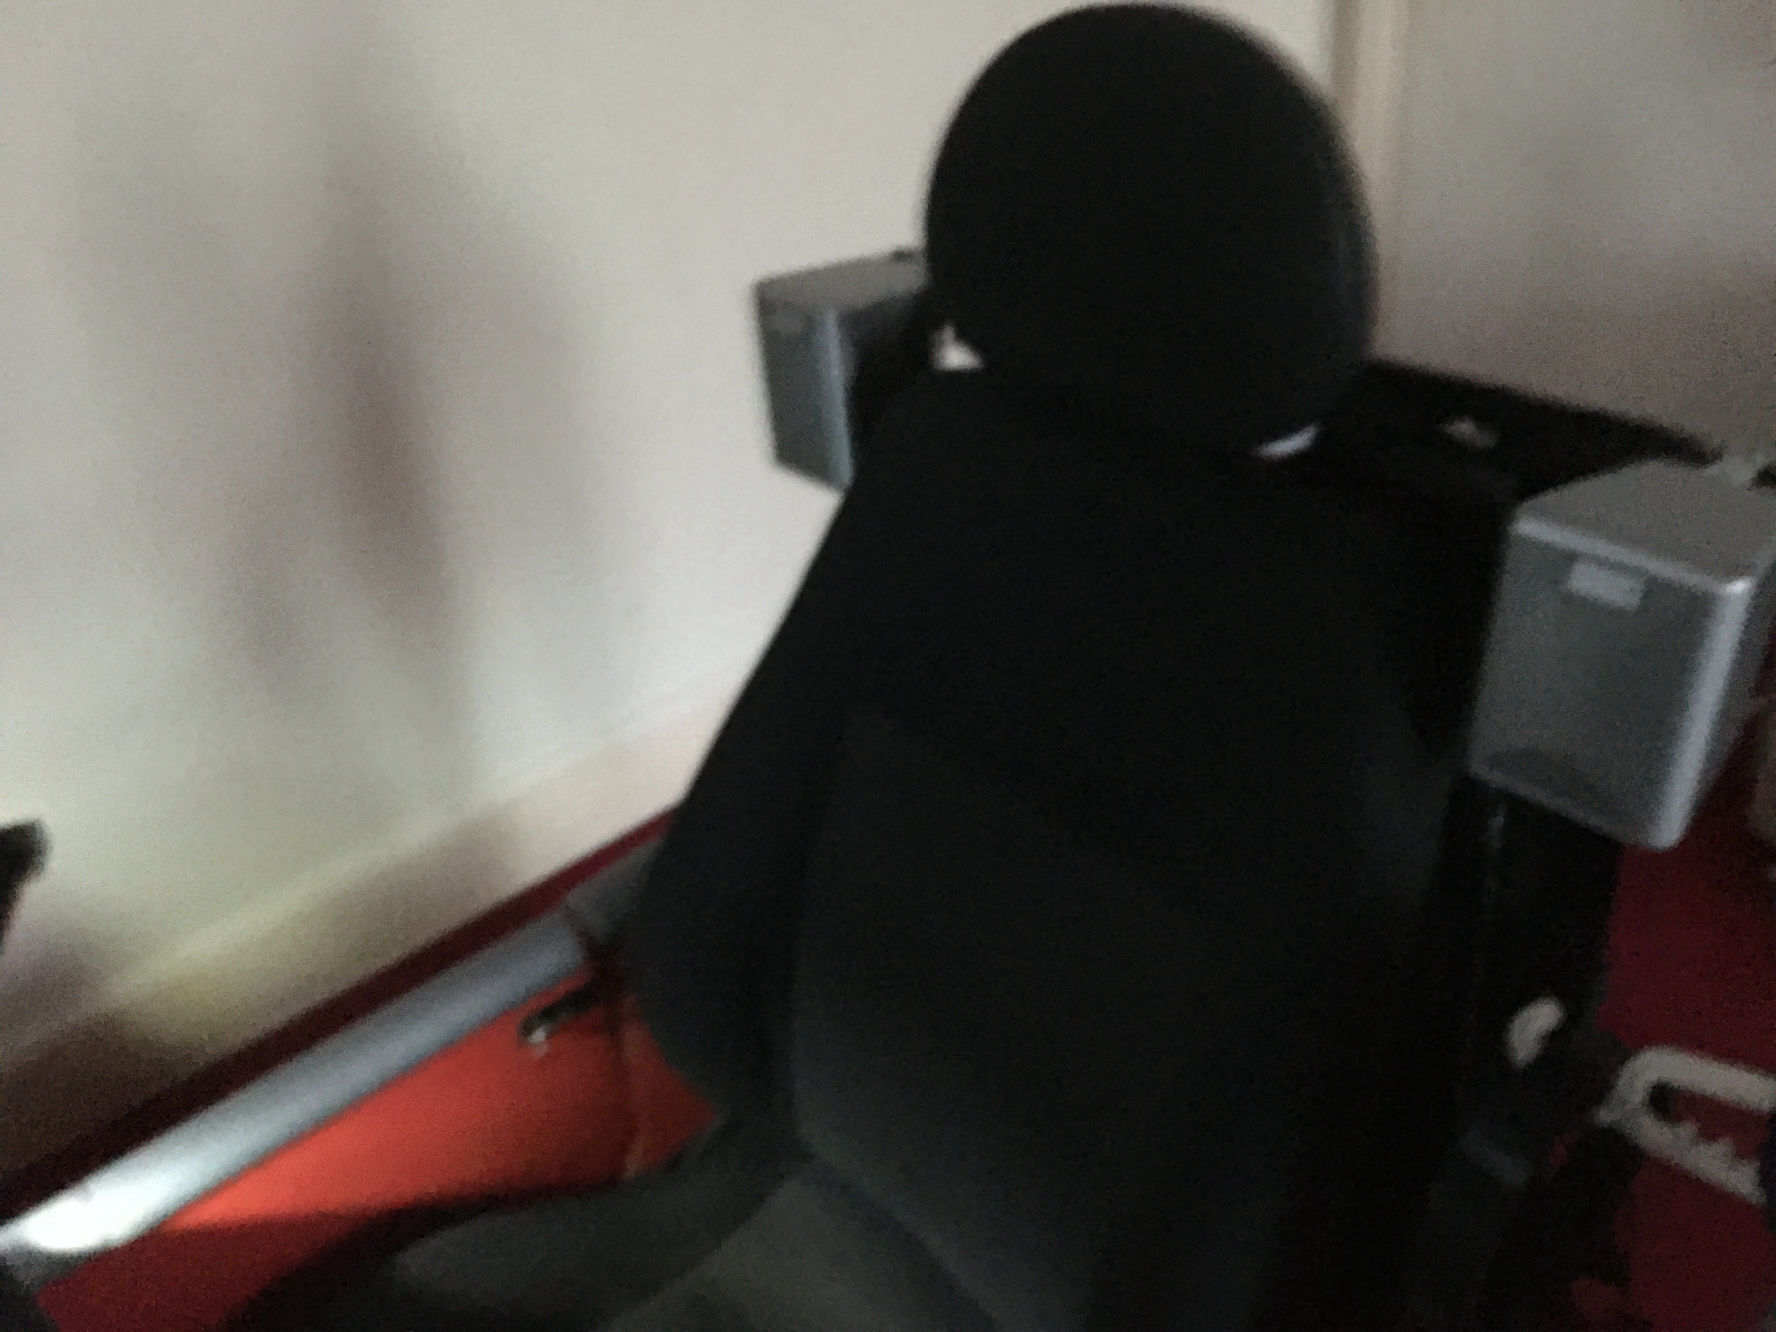
My apologies for the blurriness of the following photographs, most of these were taken late at night using an i-phone in poor light.
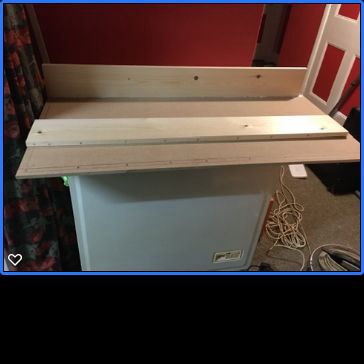
Many of the home-build rigs I looked at online tended to be 5 feet or more long and just 2 feet wide, this length would not be suitable for my front room and would block off the access door, so I needed to find a way of making it shorter. I decided on just 4 feet as a suitable length, but due to my needs of storing two computers, I increased the overall width by 1 foot, to 3 feet, which also added to overall stability. To this 3 x 4 board I glued and then screwed two lengths of 6"x1" wood, insetting them by 1" on the right side, and by 9" on the left, this would then allow for an outer skin panel to be added once complete.
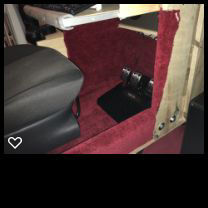
After securing the two runners and checking legroom, I attached two further lengths across making sure they matched with the runners on the sliding seat base. I suffer with back issues and tend to sit very upright in my car seat when driving, I drove ambulances for many years and I grew used to sitting very upright. I later I moved these cross-struts back more to enable the seat to slide further back for anyone with longer legs than I have.
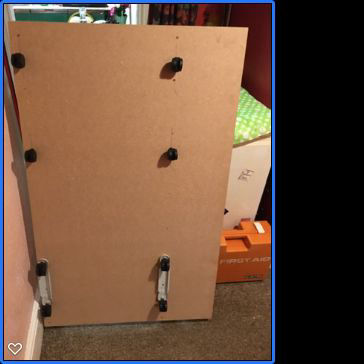
As I already had them, I then fitted castors to the underside to enable me to move the unit for cleaning or to perform any required maintenance.
THIS WAS MY 1ST FAILURE!
I totally underestimated the weight of the finished unit plus the weight of the person sitting in it, and also the capabilities of the plastic castors, they came from and old computer chair and I did not realise they had plastic axles, and one of the front ones soon gave way as the project grew.
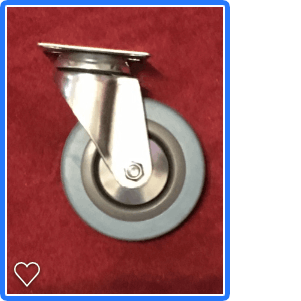
So I then decided that I would fit 4" bolt-on wheels on the sides at the front end, the rear of the unit not being quite so heavy I thought that adding handles so that it could be lifted would then allow movement in all directions by the two front wheels a bit like a wheelbarrow.
2ND FAILURE !
Even though they appeared strong, the two polypropylene cart/trolley wheels failed dramatically and literally folded the first time I moved the unit, being small they also needed quite a bit of effort to move over carpet.
I have now solved this issue by exchanging these for four really heavy duty castor wheels, similar to those used on supermarket shopping trolley's but bigger. These cost around £6 each, but the wider rubber tyre makes movement across carpet much easier too. If you are going to make your unit mobile, go for the strongest castors or wheels that you can find!
Due to the design of my main PC and the positions of the power button, USB ports and the DVD tray, I needed to raise it from up the base. As I will be covering the outside later with a panel, I needed to ensure access from the rear of the PC and the ability to slide it out in case of maintenance, while also ensuring sufficient airflow to cool the PC.
The second PC would face the opposite way and be lower, also accessible for maintenance from its rear, and at just the right height to cover the top to use as an arm rest while still able to access the front panel controls. The new space under the PC would provide a suitable path for cabling and be ideal for the storage of my 2 exetrnal drives and power strips.
Not being able to afford a full 'Motion-Rig', I wanted my simulator to be as realistic and immersive as possible, the only way I could do that was to make sure it had a sound output far better than the computer or TV speakers.
I had previously bought a bluetooth sound bar for my television, So my original surround sound system was now rarely used, but although rarely used I still wanted this available to use by my PC for playing music, and also for my radio unit separate, so I decided to utilise it within the simulator rig.
First I secured the heavy and powerful Alphason sub-woofer in the foot well above the pedals, facing the drivers seat.
Removing the speakers from the corners of my room, I fitted the centre speaker just behind the steering wheel. The remaining 4 smaller speakers were mounted in the four corners of the simulator rig.
The Bass effect of this hefty speaker vibrating through the woodwork would add to the effect of engine sounds, and the 5 other surrounding speakers would add realism from the other external sounds and still enable me to listen to music.
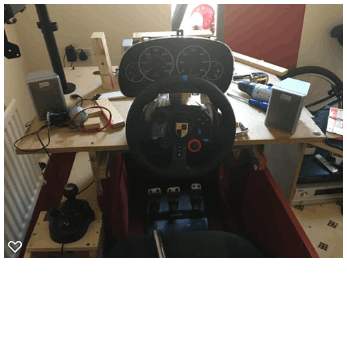
Although speedometers are shown on screen in simulation games, they tend to be very small and extremely hard to read. One way around this is to use 'Telemetry', where the output readings of these dials and clocks can be displayed on a separate screen.
I found a terrific 'Application' called 'Sim-Dashboard', it does have a free to use version but this comes with limitations, purchasing the Professional version only cost around £12 and enabled a far wider range of layouts and options, and so a no-brainer!. Sim-Dashboard works on Android phones and tablets, linking them to the computer or games machine and accessing the telemetry output. It does offer more range to a user of a PC. A link to this application can be found in the accessories section.
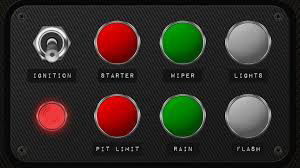
Sim-Dashboard has a built-in selection of simulated dashboards and access to 'User-created' displays, or you can design your own to suit your needs. It can replicate the Speedometer, Rev-counter, Fuel/air/water/temp gauges in a size that you choose. But it can also work as a touchscreen 'Button-Box', producing graphical animated switches that can be assigned to match keyboard keys.
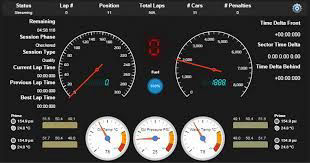
Although I planned to later fit read dashboard clocks, I decided to use this application to better display the dashboard dials, and also as a much needed Button-box for the wide variety of controls used by the simulators.
But I needed to be able to quickly disconnect the tablet when it was needed for other things or if I was to take away with me.
So I bent a few old brackets to the right shape and angle, then glued 2 strips of beading across them to create a frame. I then attached a wider plastic strip across the bottom to create a pocket at the bottom to slide my tablet into and securely hold the tablet in place. The angled brackets enabled me to mount the frame to the shelf behind the steering wheel.
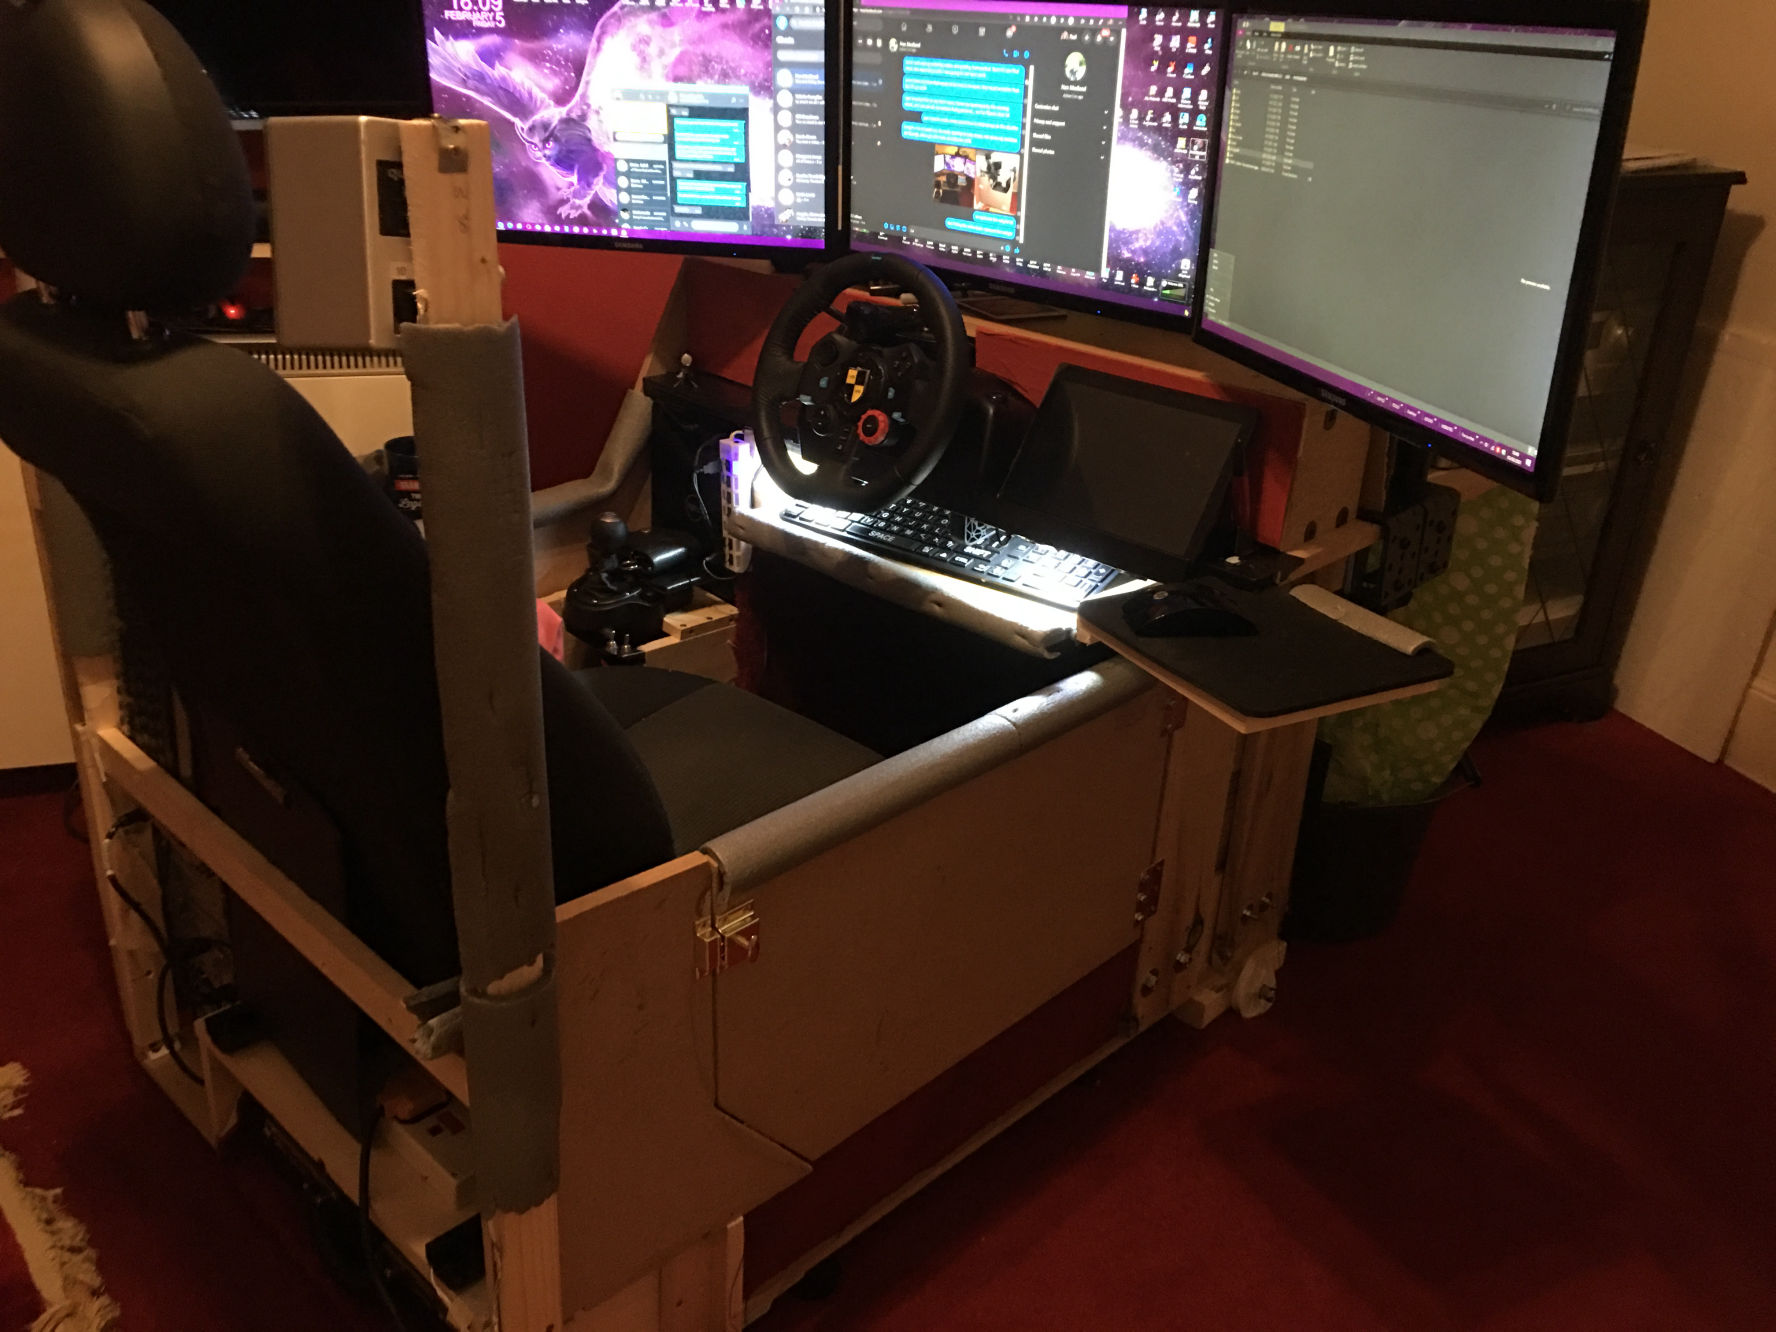
As I needed to use my keyboard not only when playing but also when writing, I needed the keyboard in a more central position. I used the runners from an old shelf and built a new pull out tray just below the steering wheel. Now when writing I can move the seat back and the keyboard pulls out and is at a suitable and comfortable height just above my lap. I can also use this shelf if and when I need to use my laptop or as a table top for writing/drawing.
After covering the rough edges of the wooden side struts with foam pipe lagging, I lined the inside of the foot well with thick cardboard to insulate it from the PC, and then used the left over carpet from my living room to cover the inside floor and sides of the foot well.
After a few weeks of use I discovered that using different sized screens was not the best idea, it distorted the image and played havoc with vision, so I had to give in and buy another monitor that matched the other two, and also purchased a third monitor support arm.
The smaller screen meant it needed to be closer, with no real need now for the upper shelf I removed it to help save weight, and moved the dashboard box closer to the steering wheel. This took away the area I used for my mouse pad, so I made a swivelling shelf on the right hand side.
I then fitted a side panel, drilling rows of holes before covering with plastic vents level with the ventilation holes on the two computers now hidden behind it.

Originally I was going to leave the right side of the rig open, as a step-thru entrance, But I have a young grandchild who is fascinated by the steering wheel and makes a bee-line for it as soon as he sees it. With all the switches for the computer and the rig on the inside, it soon became apparent that I needed to fit some form of door. I had enough wood left over to make an outer skin on the right, so I cut and then hinged it to create a door. A simple brass door latch on the outside keeps it closed, and there is another hidden sliding bolt on the inside to use when needed that will stop him opening the door and accessing the power buttons.
I cut out some panels of thick cardboard to fill the areas left exposed by the new door and stapled them into place before painting to match my wall and helping it to blend in.
I still have to acquire some black vinyl material to cover the top of the dashboard, keyboard shelf, arm-rest, around the gear shifter, and the foam edging on the panels. I have a sheet of packaging foam that I am cutting to make a padded inner door lining which will also be covered.
THE INDICATOR CONTROLS
Trying to steer and drive a vehicle, operating pedals and changing gears is hard enough as it is, trying to find keys on a keyboard each time you wish to turn on your indicators can be a nightmare and distraction from the screen/s. There are special units on sale that can added to the Logitec or Thrustmaster steering wheels which have an indicator and wiper stalk, but these units are over a £100.
I managed to purchase a cheap USB computer mouse (£1 from the pound shop), after soldering a few wires onto the mouse's button switches on the circuit board, I wired them to a two-way 12v flasher switch which I mounted to a small frame made from L-shape brackets. This was placed into a small cardboard box abut the size of a cigarette packet and then covered with black tape before mounting to the left of the steering wheel. I then fitted a short length of thick stiff rubber tubing (Outer covering for 3-core electrical cable) over the switch toggle, and selecting the mouse buttons to operate the indicators in the simulation program I made a fully working indicator stalk.
Although I presently use a Android tablet to display some of the vehicle instruments and controls this is only temporary. I am looking out for an electronic speedometer, tachometer, fuel gauge, oil pressure gauge, air pressure gauge, and volt meter, either all built into one unit or being separate units that I can mount into the dashboard panel. Cheap USB Joystick Encoder Controller boards (around £5 each) can be used to operate all these dials and match the games readings. They will also allow use of automotive switches to operate many of the in-game controls such as Lights, engine start, wipers, window controls, engine brake, traction controls, radio etc. I will also use the same encoder board to operate a handbrake.
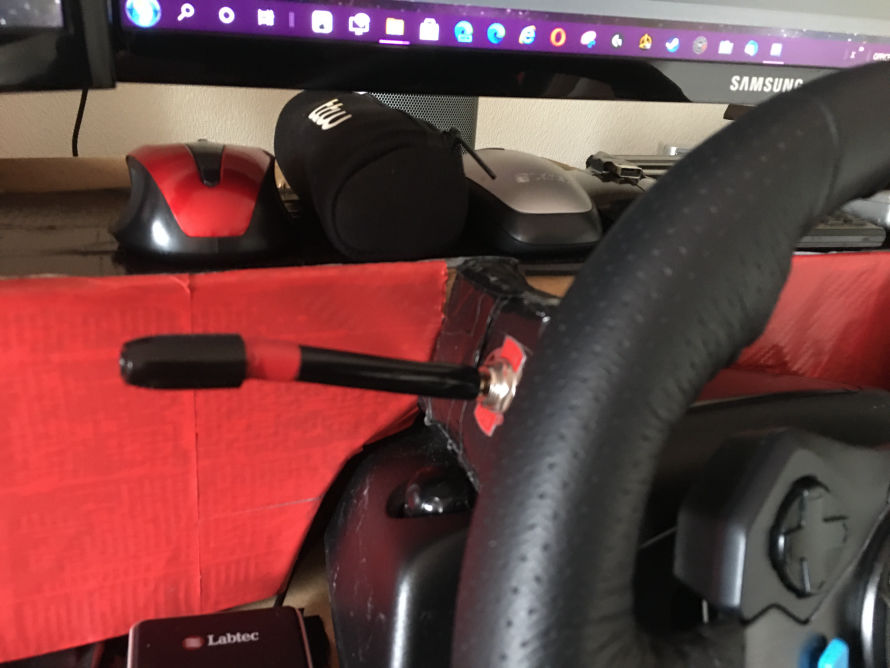
The Indicator Stalk
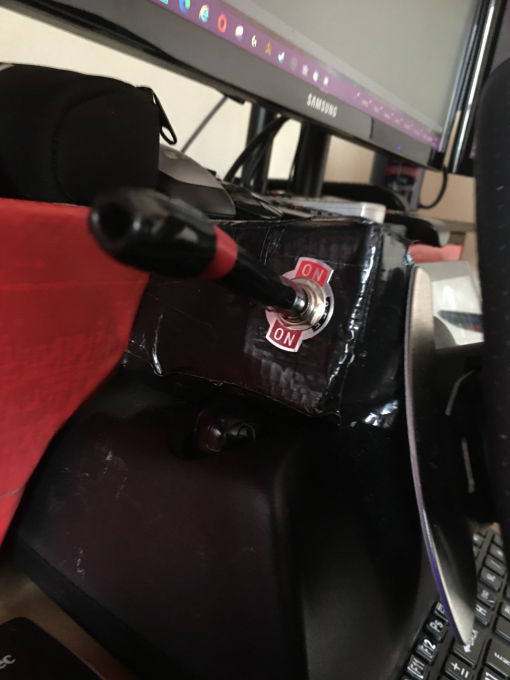
The 2-way flasher switch
Due to the old house I was living in being put on the market, I was forced to move from a large 3-bed flat to a much smaller 2-bed. With less room to use I had to try to redesign my Sim-Rig so that it was one self-contained unit. This meant that I had to fit the large Amplifier unit and radio unit onto the shelf behind the triple monitors. The big screen TV is now mounted above and angled slightly backwards so that it is easier to see from the car seat.
I have now fully carpeted all the inside panels, including the door and keyboard shelf which helps to reduce typing sounds when recording. I can now concentrate on creating a new side panel to hide the screen mounts and electronics, then it will be ready for a proper glossy paint job!
I have also managed to obtain an Instrument Cluster from a Peugeot Boxer van which I have fitted just above the Logitec G29 steering box. Using a USB joystick encoder I will link this to the computer, lighting it up with a 12v power source. Once I have built the dashboard panels and fitted all the switches, this will free up my tablet to use as a streaming control box.
Page was created with Mobirise